Last Update Date:2025/2/25
Supported App Versions:6.23 and above
*The image on the page may differ from the actual app screen.
Premium Add-on
An unlimited number of Premium Add-on are available with a single purchase.
You can use it on all devices with the same Apple ID.
Function List
- Selecting and displaying multiple logs
- Playback of recorded routes
- Display a portion of the log in a specified range
- Hide ads
* To purchase the Premium Add-on, go to the purchase screen from the settings screen in the app.
Selecting and displaying multiple logs
You can select a log from the list to be displayed on all log display screen.
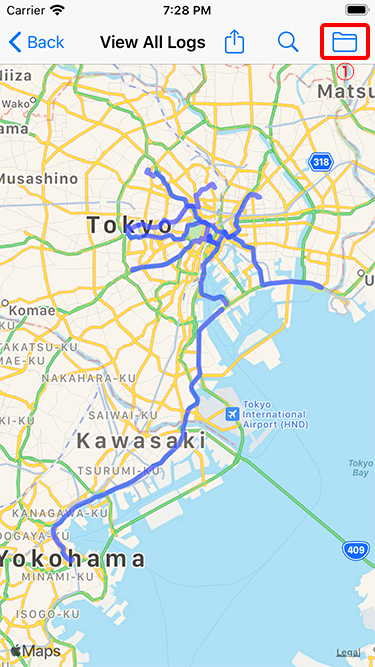
- A list of logs is displayed
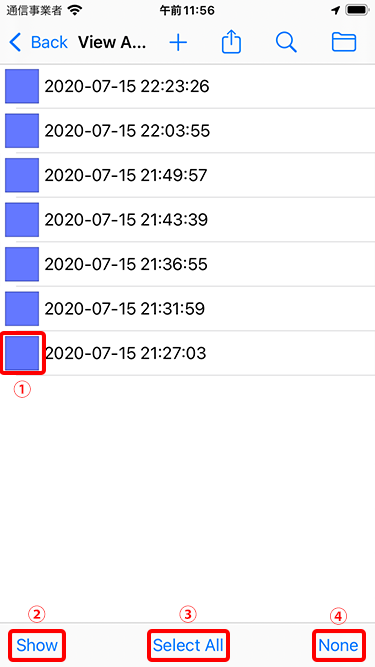
- Set the color of the log display
- Viewing the selected log
- Select all logs
- Deselect all selected logs
The selected log is displayed on the map when you select the log that you want to display from the list of logs and tap Button “Show” (2).
You can also change the color of the log display to display it in a different color.
There are eight colors to choose from, including the usual colors.
Ability to display in route color for each group
Routes can be displayed on all log display screens according to the route color for each pre-defined group.
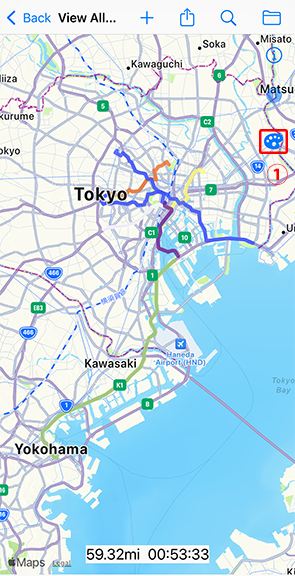
- Toggles the display in route color for each group
The route color for each group is only applied to all log display screens.
When multiple logs are selected and displayed using the “Selecting and displaying multiple logs” function, the color specified there will take precedence.
The route color for each group can be set from the in-application settings screen.
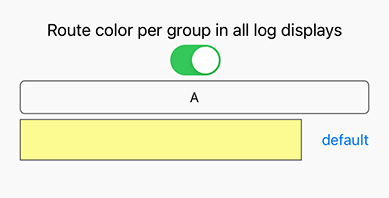
The switch enables or disables the function when the log display screen is opened.
Select the group you wish to set and set the route color.
Playback of recorded routes
The route can be played back on the log display screen.
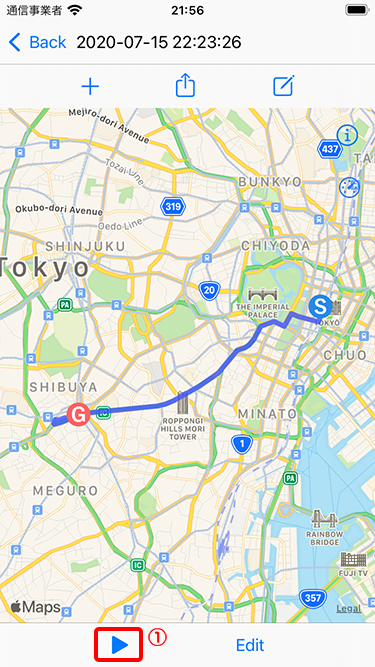
- The play menu will appear.
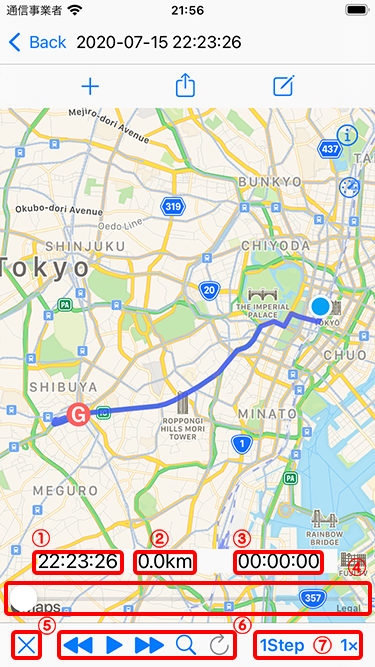
- Recording time of the display position
- Distance from the recording start position to the display position
- Elapsed time from the recording start position to the display position
- Display position change slider
- Playback end button
- From left to right
- Move the display position forward by one
- Play/Stop
- Move the display position to the next one
- Track the displayed position
- Loop playback
- From left to right
- Amount of movement at a time during playback
- Playback speed
Reference Video
Display a portion of the log in a specified range
In the log display screen, you can specify a range to display.
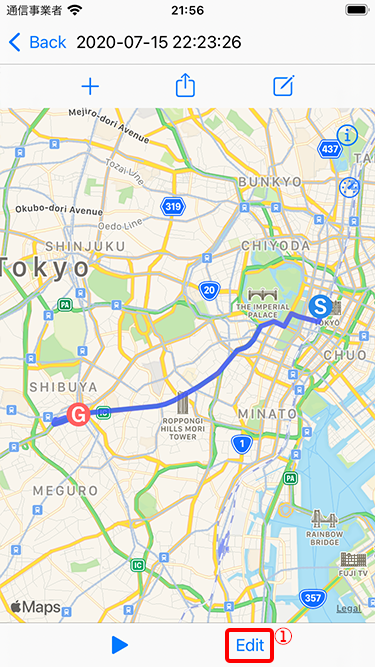
- The Edit Log menu opens
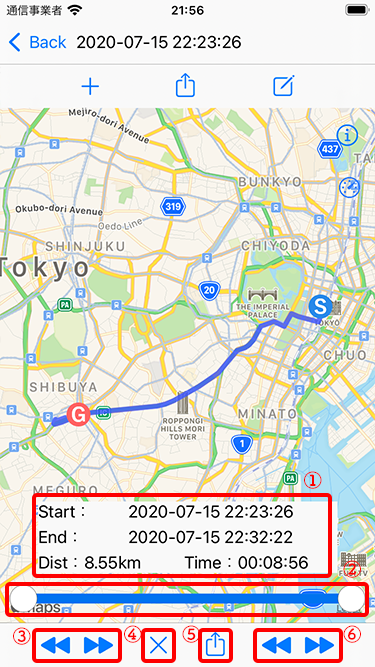
- Log information
- Display range slider
- Change the start position
- Function end button
- Share button
- Changing the end position
(1) Log information will be displayed for the specified range.
Also, if you specify a range and click the share button to output a GPX file, the data in the specified range will be output.
By loading the file output from here into the application again, you can save the specified range as a new log.